Getting started: tools and preparation
Before diving into the installation of laminate flooring, it's essential to gather all necessary materials and ensure your space is properly prepped. Quick-Step flooring offers various options including laminate, vinyl, and wood floors that can transform any room with styles ranging from classic oak to modern tile effect designs. With proper preparation, you'll achieve that professional result you're after in your home improvement project.
Essential tools for laminate installation
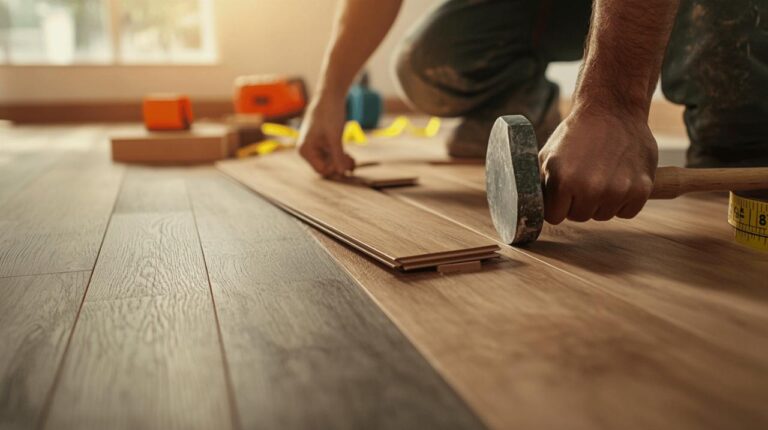
A successful laminate installation begins with having the right tools at hand. You'll need a reliable tape measure for accurate dimensions, a Stanley knife for precise cutting, and a saw for more substantial cuts. Spacers are crucial for maintaining expansion gaps around the perimeter of your room. Additionally, you'll want a tapping block and pull bar to ensure planks lock together properly without damage. Consider investing in knee pads if you're tackling larger areas, as laminate installation involves considerable time on your knees.
Preparing your subfloor properly
The foundation of your new floor determines its longevity and appearance. Your subfloor must be clean, dry, and level before laying any laminate planks. Remove all debris and vacuum thoroughly. Check for moisture issues, particularly in areas prone to dampness. Any unevenness exceeding 3mm over a 1-metre span should be addressed with appropriate levelling compound. For concrete subfloors, a moisture barrier is essential, while wooden subfloors should be checked for loose boards that need securing. Taking time with this preparation stage pays dividends in the quality of your finished floor.
The installation process: step-by-step guide
Once your space is prepared, you can begin the actual installation process. Quick-Step flooring systems typically feature a click-lock mechanism that allows for a floating installation without glue, making the process accessible for DIY enthusiasts. Remember that careful planning before cutting your first plank can save you time and materials.
Laying underlayment and first planks
Begin by rolling out the underlayment across your prepared subfloor, trimming it to fit the room dimensions. Underlayment provides acoustic insulation, minor levelling, and moisture protection. When starting with your first row, position planks with the tongue side facing the wall and use spacers to maintain a consistent expansion gap of approximately 8-10mm. Work from left to right, clicking planks together at the short ends first. The first row sets the tone for your entire installation, so take extra care to ensure it's straight and properly aligned with your room.
Tackling corners and edges
When you encounter corners or edges, precise measurements and cuts become critical. Mark your planks carefully before cutting, always measuring twice to avoid waste. For irregular shapes or doorframes, create paper templates to transfer onto your planks for accurate cutting. Remember the old carpenter's adage: measure twice, cut once. Staggering your planks creates structural stability and an aesthetically pleasing herringbone or traditional layout. Aim for at least 30cm offset between joints in adjacent rows to prevent weak points in your flooring system.
Room-specific installation tips
Different rooms present unique challenges when installing laminate flooring. From moisture concerns in kitchens to aesthetic considerations in living spaces, adapting your approach to each room ensures optimal results and longevity of your new floors.
Kitchens and bathrooms: moisture considerations
When installing laminate in kitchens or bathrooms, moisture resistance becomes paramount. Select specifically designed moisture-resistant laminate products for these areas. Apply silicone sealant around the perimeter where the floor meets fixtures, appliances, and cabinetry to prevent water infiltration. Consider additional moisture barriers beneath your underlayment for extra protection. Remember that even moisture-resistant laminate isn't fully waterproof, so promptly wipe up spills and avoid excessive water during cleaning. Some Quick-Step flooring options are specifically engineered for these challenging environments, offering enhanced protection against the inevitable splashes and humidity fluctuations.
Living areas and bedrooms: aesthetic choices
In living areas and bedrooms, aesthetic considerations often take priority. Consider the direction of natural light when deciding the orientation of your planks, as this affects how the patterns and wood grain appear at different times of day. Wider planks can make smaller rooms appear more spacious, while herringbone patterns add visual interest to larger areas. For a cohesive look throughout your home, consider how your flooring transitions between rooms. Quick-Step offers matching transition strips that maintain visual flow while accommodating different flooring types or levels between spaces. The direction of plank installation can guide movement through your home or highlight architectural features.
Finishing touches and maintenance
After installation comes the important work of finishing your project professionally and establishing a maintenance routine that will keep your floors looking beautiful for years to come.
Skirting boards and transition strips
Once your laminate is installed, remove all spacers and address the expansion gaps with skirting boards or beading. These not only cover the necessary expansion space but also create a polished, finished look. For room transitions, install appropriate profiles that accommodate movement between different flooring materials or levels. These transition strips prevent edge damage and create smooth passage between spaces. When installing under doorframes, undercut the casing to allow the flooring to slide underneath for a clean finish rather than cutting awkward shapes around the frame.
Caring for your new laminate flooring
Proper maintenance extends the life of your laminate flooring. Sweep or vacuum regularly with a soft brush attachment to prevent scratching from grit and debris. Wipe spills immediately and clean with a slightly damp mop using cleaning products specifically formulated for laminate surfaces. Avoid steam cleaners, which can damage the laminate structure, and never wax or polish these floors. Place felt pads under furniture legs and use protective mats in high-traffic areas. If you've installed Quick-Step flooring with underfloor heating, follow manufacturer guidelines regarding temperature limitations to prevent warping or joint separation. With proper care, your sustainable flooring choice will provide beauty and functionality for many years.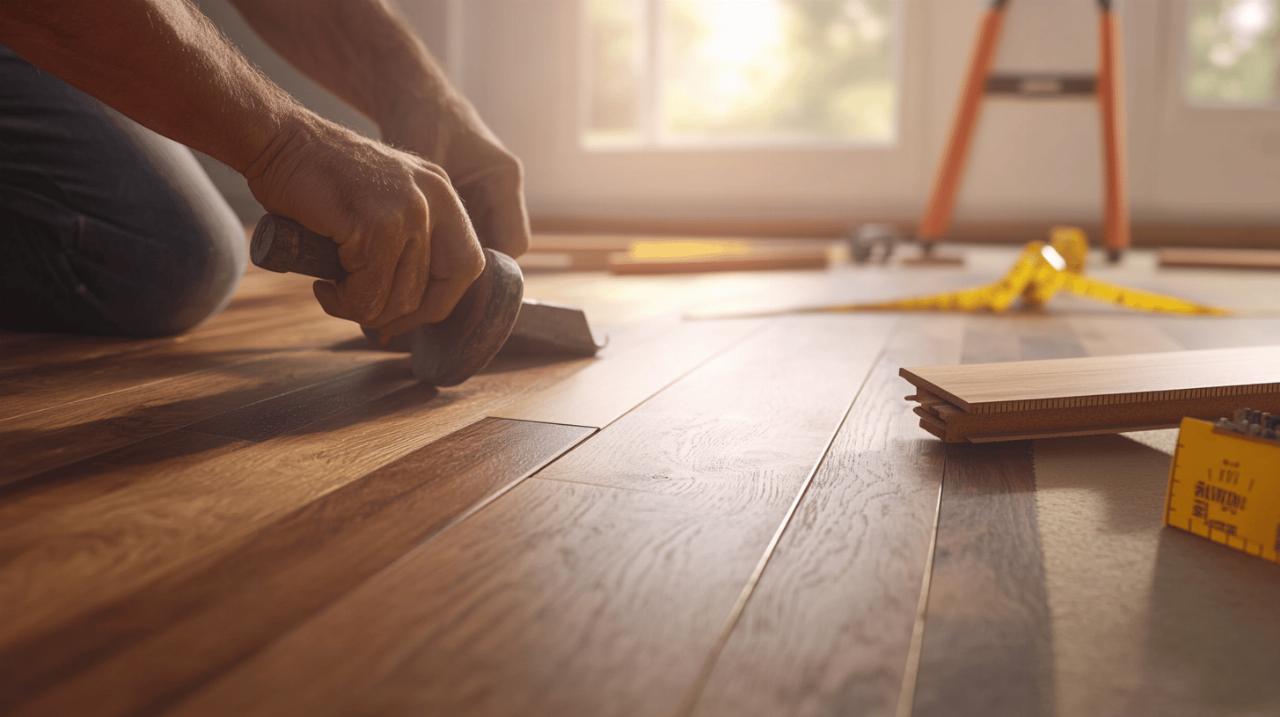
Dealing with Room Transitions and Special Features
Laying laminate flooring (also known as floating floor) is a brilliant way to transform your home with a smart, durable surface that's suitable for DIY enthusiasts. When working with Quick-Step flooring or similar laminate products, certain areas require special attention. Proper installation around doorways, between rooms, and accounting for natural material movement will ensure your new floors look smashing and last for years.
Navigating doorframes and room boundaries
When installing laminate planks between rooms, the transition areas demand careful planning. For a truly professional result, lay your floorboards across the doorway rather than stopping at the threshold. This creates a seamless flow between spaces and elevates the overall aesthetic of your home.
Doorframes present a unique challenge during installation. You'll need to undercut the frame to allow the laminate to slide underneath, giving a neat finish without unsightly gaps. Use a piece of laminate and underlayment as a guide for your saw to ensure you cut at the exact height needed. For oak, tile effect or herringbone patterns, this technique is particularly important as it maintains the visual continuity of your chosen design.
When working with different flooring types between rooms, such as transitioning from laminate to vinyl, specialised transition strips are essential. These not only create a smooth junction but also protect the edge of your laminate from damage and help accommodate different floor heights.
Managing expansion joints for lasting results
Expansion joints are absolutely crucial when installing any floating floor system, whether you're using Quick-Step or another brand. Laminate and wood floors naturally expand and contract with temperature and humidity changes, and without proper expansion space, your lovely new floor may buckle or warp.
Leave a gap of approximately 8-10mm around the perimeter of each room, including around fixed objects like kitchen islands or built-in wardrobes. This expansion space can be neatly concealed with skirting boards or beading for a clean finish.
For larger areas exceeding 12 metres in length or width, additional expansion joints within the floor area might be necessary. These can be strategically placed in doorways or beneath furniture to minimise their visual impact while still allowing the floor to move naturally.
If you're installing laminate over underfloor heating, expansion requirements become even more important. The greater temperature fluctuations mean you'll need to be especially careful about allowing adequate movement space to prevent damage to your planks.
By paying close attention to these transition areas and expansion requirements, your DIY laminate installation will achieve that sought-after professional result, making your home look absolutely brilliant with minimal fuss.